Writing Actions
Overview
Writing actions is the heart of the D5D system. The D5d system allows end-users to write actions that are used to execute a step in their workflow. Actions can be written in multiple languages
- Shell commands
- Python
- Golang
- Python
As mentioned in the Architecture diagram, a pipeline is made up of multiple tasks. Each task is backed by an action that could be written by the end-user or provided as part of the platform. Each of these actions will have 2 components.
- JSON File that indicates how the UI for that action should be rendered, what its input arguments and what its output arguments
- Action File(s) that are stored as Configmap which contain the logic that needs to be executed when the action is called as part of the pipeline.
Once both these files are written and deployed as mentioned in the Deploy section,that action is ready for use and will appear in the D5D UI for use in multiple pipelines. Enjoy!
JSON File
The JSON File is the input for the D5D UI System as well as the backend to know information about inputs and outputs required for an action. Sample JSON File
{
  "name": "shell script runner",
  "description": "Shell Script Runner ",
  "internalName": "shell_command_runner",
  "checkoutSource": false,
  "infrastructure": false,
  "projects": false,
  "Categories": "SSH",
  "logo": "Shell Script",
  "inputs": [
    {
      "type": "textarea",
      "formName": "script",
      "valueType": "configmap",
      "required": true,
      "description": "Enter script",
      "multiple": false,
      "label": "Script",
      "value": "",
      "defaultValue": "",
      "useOutput": false,
      "createConfigMap": true
    },
    {
      "description": "Mount directory in script?",
      "value": [
        {
          "text": "Yes",
          "id": 1
        },
        {
          "text": "No",
          "id": 2
        }
      ],
      "valueType": "attribute",
      "label": "Mount directory in script?",
      "required": true,
      "type": "radio",
      "formName": "MOUNT_DIRECTORY",
      "defaultValue": "No",
      "useOutput": false
    },
   .......
   ],
   "outputs": [
    {
      "name": "TEST",
      "valueType": "attribute"
    }
   ]
The JSON file has multiple elements , lets look at each of them and their purpose:
Metadata
name: Name of the task (Internal), used to show the name in the Actions list when creating a pipelinedescription: Description of the Task. Shows up when viewed under the Category, when creating a pipeline. This is the visible name of the task for the userinternalName: Internal Name for the Task. This is the name with which the configmap containing the code for the action is referenced. Each action based configmap contains an internal annotation calledaction-namewhich contains this value and is used by the D5D system to call the corresponding action when an action with thisinternalNameis used in a task. This is a very critical piece of information and every internalName should have a configmap associated with it.checkoutSource: Attribute that should be set to true if we want to have a task to run a source code checkout before the action is run. This will automatically mean that theinfrastructureandprojectsshould be true for the checkout source to work. This setting totruewill insert an internalcheckout-sourcetask which is responsible for checking out the sourcecode for that project, and the branch its associated in that environmentinfrastructure: Setting this to true will show all the "Stages" configured for this project. You can set this to true if you want the user to select which environment a task needs to be run against. For e.g. this can be used to run a Docker build against the backend project for "Dev". In this case, you will set theinfrastructureto true so the users can select the "Dev" environment when the pipeline is configuredprojects: Setting this to true shows all the projects available in this application. This is done in conjuntion with theinfrastructureflag so that once an environment is selected, say Dev, The associated project is selected which internally will select the branch thats configured for that project. For e.g. if you have abackendproject having a git repo calledgitlab.starsystems.in/raja/d5d-backend, theDevstage could be pointing to adevelopmentgit branch and theUATstage can be pointing to apre-releasegit branch. When bothinfrastructureandprojectsare set to true, the user will have the ability to selectDevorUATfrom the dropdown against theInfrastructureoption and theProjectsdropdown will containd5d-backend. Internally the system will select thedevelopmentbranch whenDevis used as the infrastructure andpre-releasebranch whenUATis selected as the infrastructure.Categories: Category under which this task needs to be grouped. When a pipeline is configured, the tasks are grouped into Categories for easier management. A Task at this time can only belong to a single categorylogo: Logo to use for the Task in the UI.TODO: This is hardcoded for now
Inputs
The inputs section is an array of the various inputs that are required for this action. This information is
used by the D5D UI system to automatically draw a set of UIs based on information from this JSON file. Each
element of the inputs array contains one element of the UI. These are the elements that make up the input element:
type: The type of the element displayed in the UI. We currently support the following types:textarea: This indicates a textarea where more than one line of input can be entered by the user.text: Single line text element where a value can be enteredradio: Radio input where only one value can be picked. Each radio element can be an array containing two elements, atextwhich is what gets displayed on the UI and anidwhich is the internal value sent to the backend system.ng-select: Dropdown of values from which to choose one. Typically pulled from a dynamic backend. See below for how to configure the URL from which the value can be fetched. The returned value will again be an array with each element containing atextwhich is what gets displayed on the UI and anidwhich is the internal valuefile: File control that allows a user to upload a file from their browsertag: Field that allows multiple entries for a field. For e.g. if you wanted to expose an array of ports to the backend, you will use thetagtype which will result in multiple values be entered against that field. You can enter one value and hit thetabto make that an element and continue doing it for other elements.
valueType: This is the type of the attribute that will be returned to the backend engine. The D5D engine currently supports five typesattribute: This is used for any normal value that gets sent to the backend. The value is passed as is as the literal as it was entered on the screenconfigmap: The contents of this value gets stored as a kubernetes configmap in the application's namespace and the name of the namespace gets sent to the backend.secret: The contents of this value gets stored as a Kubernetes Opaque Literal Secret in the application's namespace. The name of the secret gets sent to the backenddirectory: This is usually used in the case of references from a previous task being sent to subsequent tasks, but in any case the name of the PVC (Persistent Volume Claim) where the previous task's output was stored gets sent to the backend.file: This is also used in the case of references from a previous task being sent to subsequent tasks. The name of the PVC from previous task gets sent to the backendattributeArray: This is used for anytagtype from before where an array of values needs to be sent against a name. The values are usually sent as an array to the backend against the same name.
formName: The name of the attribute that gets sent to the backend. The Action scripts assume this name and write the logic. This is purely internal (And users dont see it) and it used as the name against which the value entered by the user gets mapped and is sent to backend.required: Whether this value is optional or mandatory to enter for this action. Please note that it is upto the action to have sensible defaults in case the value does not reach the backend.label: The text that accompanies a UI attribute. This is the text that explains to the User creating the task what that input value is used for. This can be as verbose as you can be to explain the meaning of that attribute.description: The default placeholder text that appears against the label. This will be pre-defined placeholder text for a user to know what type of value can be placed against this attribute.defaultValue: The default value to show up against the field when the user starts entering valueuseOutput: This field is used when we need to use the output from a previous task into this task. For e.g. when we chain tasks, there are outputs from the previous tasks that need to be used in the current task. Settings this to true brings up all the outputs from prevous tasks that match the currentvalueTypeattribute. i.e. only Directories exported from previous tasks will show here if the current field's valuetype isdirectory.hidden: Used to have hidden fields that may be not shown immediately or only shown when a related condition becomes true. Set to true, if u want this to be sent to the backend but not be shown to the userhiddenCondition: This dictionary consists of three elements,parentFormNamewhich indicates which parent field this hidden condition should base itself on, andvaluewhich indicates which value in the parentForm should make this unhidden. You could also do aallowAnyvalue to be true if any value in the parent form is selected. So for e.g. if we have something likehiddenCondition": { "parentFormName": "MOUNT_DIRECTORY", "value": "Yes", "allowAny": false }, it means that the current field will show up ONLY in theMOUNT_DIRECTORYfield has a value ofYes. If theallowAnywas set to true, then any option inMOUNT_DIRECTORYwill make the current field unhiddenisDynamic: This field is used to define how to get values for fields that need dynamic inputs. Right now the backend for this needs to be part of D5D system, so there isnt much scope for improving or writing custom actions here, but will update when we improve on this. TODO: We need to improve this
Outputs
The outputs section is an array of the various output elements exposed by this action. Any attribute that is exported
from the current task that may be needed by other tasks can be entered here so its available when the other future tasks are configured.
Please note that this is only in the context of a single pipeline task, i.e. tasks defined before can export variables that can be used by tasks that are defined after that.
Each element of the outputs array can contain one exported variable. There is no need to have that variable exported but if there are
output variables defined here, they will be considered for future input
The various types of variables that can be exported are
attribute: This is the most basic type and is a variable that gets exported as an attribute. This is just a simple key-value pair that gets exported that could be used in other places. For e.g. if you wanted to export a BUILD_NUMBER attribute, you would use this mechanism. Sample config is shown below: This creates a variable called COWSAY which will contain a value when the task is executed
    {
      "name": "COWSAY",
      "valueType": "attribute"
    }
configmap: This allows a set of key-value properties to be stored as a configuration file and exported as a configmap. This will help in cases where there are many properties to be exported but we dont want to list them all one by one using aattributetype of output. Sample config is shown below: this will export a configmap calleddjango-propswhen the task is executed.
   {
      "name": "django-props",
      "valueType": "configmap",
      "value": "/mnt/outs/configmaps"
    }
secret: Same as configmap, except that the contents are encrypted rather than be visible to everyone. Sample config is shown below: this will export a secret calledsecretwhen the task is executed.
    {
      "name": "secret-file",
      "valueType": "secret",
      "value": "/mnt/outs/secrets"
    }
directory: This is used when we want to let the directory be exported by a task and have the contents of that directory be available to a future task. The path to the directory is given as part of this setting and that path is stored as a Persistent Volume and made available to any future tasks that might want to use this directory. The directory will then be mounted onto those tasks automatically. Sample config is shown below: this will export a directory calledbase-checkoutwhen the task is executed.
    {
      "name": "base-checkout",
      "valueType": "directory",
      "value" : "/mnt/src"
    }
file: same as directory except that instead of a directory, a single file can be exported from a task to be made available for future tasks. The content is stored as a Volume similar to directory and is made available to future tasks. Sample config is shown below: this will export a file calledcowsaywhen the task is executed.
    {
      "name": "cowsay",
      "valueType": "file",
      "value" : "/mnt/files/cowsay.file"
    }
Action
Actions contain the code that will be executed when a task is run. When the JSON object for the action is updated, it renders itself into an UI based on the parameters above. Once a tasks' input fields are entered, they are sent to the backend as a task, which is then run as a Kubernetes Pod.
Actions can be written in multiple languages as per the end user's choice. We support
- Shell scripts
- Python
- Golang
- PHP
to write these actions. The actions will then need to be converted into a zip file which is then uploaded as a
configmap on the d5dpipeline-system namespace.
Processing input parameters
In any action that is written by the end-user, there will be a need to process input parameters that are entered by the
user. These params are as defined in the Inputs section and are keyed using the formName attribute.
Depending on the valueType used in the Input, the way those variables are made available to the action differently.
Please find below sections containing how its available for each of the types.
Attributes
These variables are exported as environment variables in the sandbox where the action will be run. You can use your language equivalent way of getting it from the environment to store them and use them.
For e.g. if you have a formName called TESTVAR, you can get it as
- Python
value = os.getenv('PARAM_TESTVAR')
- Shell
value=$PARAM_TESTVAR
- Golang
value := os.Getenv("PARAM_TESTVAR")
- PHP
value = getenv('PARAM_TESTVAR')
NOTE: The values are stored prefixed with a PARAM_ to differentiate them from any other environment variables that may
already be available in that sandbox.
Directories or Files
If you had files or directories exported from a previous task, they would be available at the following paths for your script to use them.
- Directories:
/mnt/in_directory/<formName>. So for e.g. if your input formname where this directory is attached is calledsourcedir, the directory will be mounted at/mnt/in_directory/sourcedirin your sandbox. There will also be an environment variable called__DIRECTORY_MOUNTED_<formName>which will point to the above directory. So accessing the variable for e.g. like
   dir_path = os.getenv('__DIRECTORY_MOUNTED_sourcedir')
   # Will return /mnt/in_directory/sourcedir
- Files:
/mnt/in_files/<formName>. If your inputformNameissourcefileand the file mounted istestfile, then the file would be mounted at/mnt/in_files/sourcefile/testfilein your sandbox. There will also be an environment variable called__FILE_MOUNTED_<formName>which will point to the above file.So accessing the variable for e.g. like
   file_path = os.getenv('__FILE_MOUNTED_sourcefile')
   # Will return /mnt/in_files/sourcefile/testfile
Configmaps
Configmaps are mounted as files in the sandbox and stored under the path /mnt/configmaps/<formName>/<file>. For e.g.
a formName of propFile, will result in a mount of /mnt/configmaps/propFile/test.out in their sandbox. Inside this sandbox
whatever was exported out into the configmap will be available as is. For e.g. you could use like
cat /mnt/configmaps/propFile/test.out # Printout the contents of the file test.out stored as a configmap
Secrets
Secrets are mounted as files in the sandbox and stored under the path /mnt/secrets/<formName>/<file>. For e.g.
a formName of secretFile, will result in a mount of /mnt/secrets/secretFile/test.out in their sandbox. Inside this sandbox
whatever was exported out into the secret will be available as is. For e.g. you could use like
cat /mnt/secrets/secretFile/test.out # Printout the contents of the file test.out stored as a secret
AttributeArray
Attribute Arrays are used when you have multiple values for a single element. Since we dont know how many values are entered
by the user against that formName, the system provides you with an environment variable called PARAM_<formName>_COUNT which
gives a count of the total values passed in and then individual environment variables like PARAM_<formName>_0,
PARAM_<formName>_1 and so on till the number of values available.
For e.g. if there is a formName called TEST which allowed the user to enter 3 values, then the system will provide
the following environment variables. PARAM_TEST_COUNT will have a value of 3, PARAM_TEST_0, PARAM_TEST_1 and PARAM_TEST_2
will be each of the individual environment variables that hold the values.
Processing Output parameters
Now that we have seen input parameters and how they are sent to the action, we also need to discuss about how the output parameters are setup so you can make use of them in your actions.
Output parameters are those that you use to send information to D5D or to other future tasks in the pipeline. Basically any data that needs to be exported out of the current action will need to be marked as an output variable as mentioned in Outputs.
Here are the output types and how you can you use them in your actions.
Attributes
attribute: Ths is used when you want to export a single attribute out of the current action. The name
of the attribute to be exported is mentioned in the output variable. The value can be exported by passing in
against the name and writing it to a TMP_DIR environment variable which is managed by the D5D system. You will
need to write (or append) to the TMP_DIR to export one ore more attributes from your current task.
Something like
Shell
echo TEST=Value1 >> $TMP_DIR
Python
    with open(os.getenv('TMP_DIR'), 'a') as f:
        f.write("TEST=Value1")
Golang
    d1 := []byte("TEST=Value1\n")
    ioutil.WriteFile(os.Getenv("TMP_DIR"), d1)
Configmap
configmap: This is used when you want to write more than a single name=value for e.g. to output. This is used
in cases where you want a whole property file to be stored so it can be used in future tasks. Refering to the example
in the Outputs section for configmap, there will be a folder called /mnt/outs/configmaps setup in the sandbox. Anything
that the action writes as a file into this folder will be stored as a configmap keyed by the filename. So, if the action
writes files one.txt with some contents and two.txt with some other contents the configmap will be created with it containing
two elements, keyed using one.txt and two.txt
Secret
secret: Similar to how configmaps are done except that the values are stored as a secret. Refering to the example, there w
will be a folder called /mnt/outs/secrets setup in the sandbox. Anything thats written into this folder will get
setup as a secret and is available for future tasks.
Directory
directory: This is used when we want to export directories that are used in future tasks. Refering to the example, there will
be a folder called /mnt/src/base-checkout setup for that configuration, under which anything can be written by the current
action. All of this is stored as a Persistent volume and is made available to any future task.
Files
file: This is when to export a single file for future tasks. Refering to the example, this will create a
structure like /mnt/files/cowsay.file which can be used by the action to write into. Anything that we write into the
file will be made available for all future tasks.
Python
Python is one of the most preferred language and is the one that is used for most of the actions in D5D. You can write by action by following the below steps.
You can use the logic in Inputs to receive input parameters. The data that needs to be exposed from this action can be posted out using the logic in Outputs. The main python module needs be called as "main.py" (You can rename it to other names but by convention, it looks up a main.py in the folder). Any other modules that it can reference can also be done relative to this module.
Any dependencies of the python module can be installed by using a requirements file in the same folder as the
main.py script. The backend framework will automatically install all the packages using a pip install on the
requirements file so its available on that sandbox where the script is running. For e.g. a folder structure containing
python action can be something like 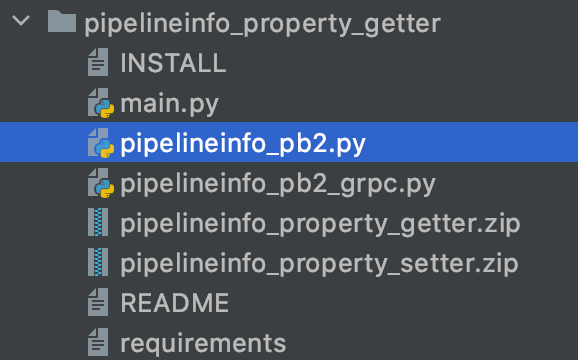
In the above example, you can see the action is called pipelineinfo_property_getter, which contains a main.py containing
the main logic, a requirements file for any dependencies it needs and additional python modules that the main
script could call.
Advanced Users: If you want to interact with the D5d Pipeline system by storing/fetching any values as part of your pipeline task or store value between tasks, you can use the GRPC module as is used by some of the internal actions. (TODO: Show how this is done)
Golang
You can also write your action in Golang by following the below steps
Similar to Python, you can use the logic in Inputs to receive input parms and use the logic in Outputs to send output data. Go modules is used to bring in any dependencies that are required by the main module.
The sandbox will do a go mod download && go run <main module> to execute the action. There will also be
supporting GRPC Pipeline Client module incase the go module needs to interact with it (TODO: Expand on how to use this).
For e.g. a folder structure containing golang action can be something like 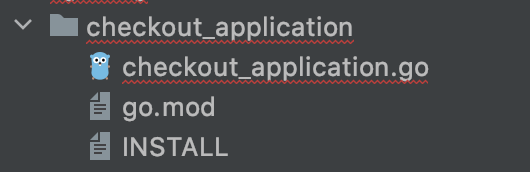
Shell
You can also write normal shell scripts and store them as actions by following the below steps. This is the easiest way to run commands as actions.
Similar to Python, you can use the logic in Inputs to receive input parms and use the logic in
Outputs to send output data. The main script to execute is typically called main.sh although
you could use any name.
Folder structure of an action using shell scripts is like 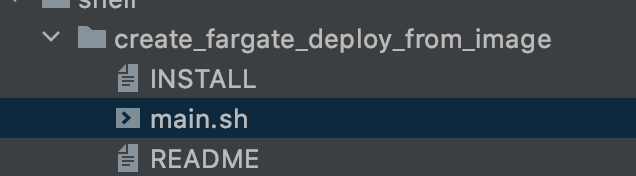
PHP
PHP scripts can also be used to write actions. This is very similar to other languages mentioned above. The
dependencies to the file can be brought in using a composer system and expects a composer.json at the top level folder
to download the dependencies. The main php file is also expected to be called main.php or as defined in the deployment section.
Deploying actions into D5D
Actions need to be deployed as configmaps into the d5dpipeline-system namespace. This is the most critical
step in how its made available to all tasks that will be run in D5D.
The following needs to be done to deploy actions into D5D
1. Compose your files into a zip file or as separate files
2. Get a unique internalName which should match with the internalName of the JSON Input (See Here)
3. Write a INSTALL script (Sample) below that deploys it into d5dpipeline-system namespace.
    kubectl create configmap disk-usage-monitoring -n d5dpipeline-system \
    --from-file=disk_usage_monitoring.zip \
    --dry-run=client -o yaml | kubectl annotate \
    action-name=disk_usage_monitoring \
    task-details='{"type":"python","configmap":"disk-usage-monitoring","name":"main.py"}' \
    --local -f - -o yaml | kubectl apply -f -
Details
From the above snippet, you can see that
- A configmap is deployed into the
d5dpipeline-systemnamespace. This configmap contains the logic for the action that will be executed when the task is sent to the D5D system. - The name of the configmap (
disk-usage-monitoringin this case) is user specific, shouldnt be duplicated with other configmaps in the system - This configmap is created from a single zip file. If you decide to use multiple files and not a zip file, pls
do multiple
--from-fileto upload all those as part of the configmap - There needs to be 2 annotations that are required for any configmap stored in d5dpipeline-system.
action-name: This is theinternalNamethat needs to be used in the JSON and is how this action is identified internally in the systemtask-details: This can be a dictionary of what needs to be filled as part of this task. This needs atleast three basic information.type: (REQUIRED) What is the language in which this action is written. One ofpython(Python) orgolang(Go language) orphp(PHP) orpod(Shell scripts)configmap: (REQUIRED) The name of the configmap where this action is stored. This is the same as the first step.name: (REQUIRED) This is the name of the main module that needs to be executed. For e.g. if its a python module calledtest.pythat needs to be called, use"name": "test.py", same for other languages, but this points to the entrypoint for that action.image: (OPTIONAL) D5D provides default images for each language environment according to thetype. If you want a custom image to be used for your action, provide them here.attributes: (OPTIONAL) Pass in an array of attributes that you want to pass in to the system. This will follow the Input structure. (TODO: Add more detail if needed)